Tuesday, May 31, 2011

My Farmer's Market Adventure

So, the real reason I haven't been posting much this week is because I have discovered the joys of bread. Yes, bread. My diet has mainly consisted of cheddar sourdough and fresh banana bread and spicy raspberry-chipotle preserves that I bought at the farmer's market last week, with some fresh mozzarella thrown in for good measure. I tell ya, it's the ultimate snack food. Perfect for breakfast, lunch, or dinner, and light enough for a midnight snack. So. Good.

What makes it great, though, is the jam. It's made by a company called Piper's Peck and it's sold at local PA farmers markets and online at http://www.piperspeck.com/hot_pepper_jellies.html. My favorites are the raspberry-chipotle preserves and the Cayenne Pepper Jelly. There's just spicy enough to cut the sweetness, but not enough to send you running for the hills. She also makes spicy chocolate fudge and a line of salsas that I've been meaning to try.


Another great local find is Fasta Ravioli & Co., affectionately called "Fasta Pasta" in our house. Last Friday was free pasta day and Brian and I each snagged a free pound of fettucini - mine was egg and his was wheat. It's all fresh pasta that's made on-site at their downtown State College location. Fasta Pasta has actually become a tradition for Brian and I - we've had their ravioli and vodka sauce on almost every special occasion for over a year, including our birthdays, Christmas (he's not Jewish), my college graduation, our anniversary, Valentine's Day, and a few times just because it was Tuesday. We always love seeing what they're going to come up with next!

We decided to turn Brian's whole wheat pasta into Chicken Picatta a la this recipe from Rachel Ray: http://www.foodnetwork.com/recipes/rachael-ray/chicken-piccata-pasta-toss-recipe2/index.html Now, most people who know me know of my incredible dislike for Rachel Ray, so it's a pure coincidence that this recipe is from her. To be honest, the only reason we used it was because somehow, without planning for it, we managed to have everything we needed on the ingredient list (except shallots, but we didn't miss them).

Grilled chicken with a crispy crust

Brian coating the chicken in sauce

The finished product

I never would have found any of this if I hadn't gone to the famer's market. Which is my way of telling all of you that farmer's markets are the best part of cooking in the summer and you should definitely make sure that you don't miss out!

Thursday, May 26, 2011

Indian Spices Giveaway

I checked my facebook page today and discovered that more than 100 people have "liked" my page! I can't tell you how happy and excited I was to see that, it's a great feeling to see that so many people are supporting me on this journey.

In honor of this great milestone, I've decided to do a giveaway!

One winner will receive a set of Indian Spices that includes Curry Powder, Garam Masala, and Tumeric. They come in these cute little jars and make a perfect gift for your favorite cook (especially if it's yourself!)

To enter, please leave a comment below or on my facebook page with your favorite food to cook (recipe optional but greatly appreciated!) In one week I'll use a random name generator to pick the winner!

Good luck and thank you again!


**Please note, all entries must include a valid email address so that I can notify the winner. If the winner does not respond to my email to claim their prize within one week of notification, a new winner will be selected.

Wednesday, May 25, 2011

It's Bacon! It's Pineapple! It's Dinner!

Remember that commercial with the dog who runs around the house screaming "it's BACON!!!!!!"? Well, consider me that dog. Because my house smells like bacon and it's utterly fantastic.

For those of you whose ears didn't just start ringing with the sound of a hyper-active, annoying pooch, here's a link to the commercial on youtube: http://www.youtube.com/watch?v=CErapf79rqM

I don't usually eat bacon, but while I was combing the internet for more resources, I came across a recipe I just couldn't resist. It's a modified turkey club with an avocado sauce and I was really excited about it because I've been wanting to try my hand at de-pitting an avocado. And did I mention the bacon?

Here's the recipe I used: http://www.foodnetwork.com/recipes/food-network-kitchens/turkey-avocado-clubs-recipe/index.html

I really like this version because I hate mayo (almost all condiments, actually) and this one uses plain greek yogurt instead (mmm....fage). I added some cayenne and garlic powder to the avocado mixture to ramp up the flavor a little bit, and I used hickory smoked turkey. I also grilled the bread in a little bit of bacon fat (a real little bit - I barely coated the pan) to add cohesiveness to the sandwich.

A warm shout-out goes to my roommate Nick who did the actual cooking of the bacon. He had no idea what he was doing but he soldiered on anyway, leaving tastiness in his wake.

Sizzlin'

I've never cooked with avocado before (judge's ruling - can that count as a new food alert???) so I was really excited to whack at the pit with my chef's knife. Apparently I wasn't excited enough, though, because that bugger wouldn't budge. For anyone who's unfamiliar with avocado anatomy, avocados have a dark green skin, light green flesh, and an annoying pit right plop in the middle. The way everyone tells you to cut it is to cut into the flesh and make a big circle around the pit, then open it up and use your knife to grab the inedible bit. In the end, I opted to just dig it out with my spoon. It was just easier that way. Speaking of easier, I threw the yogurt and avocado into the food processor because I was too lazy to mash with my spoon. It came out really good though.

Picture from these instructions on how to cut an avocado!
Avocado yogurt sauce with cayenne and garlic powder!
And here's the finished product:


Are those pineapple chucks, you ask? Why yes, yes they are! And not just any old pineapple chunks, but  chunks from the first pineapple I've ever cut up! Nick and I used our trusty dusty friend google to figure this one out. We ended up on Instructibles.com: How to Chunk a Pineapple Like a South Seas Island Boy. The instructions themselves were great, but it was annoying to have to click "next" to view each step because it took a little while to load each one on my iPhone and some of them were pretty repetitive.  It was effective though, and it helped me turn my pineapple from this:

Hi Pineapple!
To this:

Yumm.
This method of cutting up the pineapple reminded me of slicing a honeydew or cantaloupe. First you cut off the top, then you cut it in half. Then you keep halving your halves until you have eight slices, like so:

Gotta love a big knife!
Then you use a smaller knife to separate the fruit from the skin and the core from the fruit. The smaller knife (like a paring knife) is really helpful because it's easier to control. This is what that step looked like:

Oh yea...fancy knife skills

I never realized that there was a core I had to cut out, so I'm glad I had some internet guidance before I dug right in. There are tons of other how-to guides out there if this one doesn't strike your fancy. The internet has been very helpful throughout this whole process because it's sort of like your cooler older cousin - it knows everything, gives great advice, and isn't afraid to be goofy to get its point across.

Cooking with avocado and pineapple made me feel very accomplished. Even though they're not "new" foods, it's always fun to learn new ways to prepare some of your favorites. And this sandwich is definitely going to be a new favorite.

Sunday, May 22, 2011

Lists (Part 2)

Like many places, my town has two types of grocery store: the normal kind and the fancy-shmancy one. Considering that 2 months ago I was buying what little groceries I had from Walmart, both of these places would have been a huge improvement. But I chose to get to know the the fancy one better because the selection seemed better, the food seemed fresher, and it had a cafe area that I could sit at while I finalized my grocery list. This has worked well for me on all but one level - it's coupon prospects sucked. Luckily, Brian is more skilled in couponing than I am, and he agreed to show me why he has always favored the other grocery store.

The reason is, in a word, DOUBLE coupons.


And they seriously rock. All told, we saved about $50 on items that we would have bought anyway. Consider my mind blown.

As I mentioned in a previous post, the grocery list is the best way to protect yourself from expensive impulse buying. Brian took it a step further by going on the store's website and helping me match items on my list with discounts he could get with his bonus card. Then we used the weekly circular to look for extra deals on items we were already buying and other things that we need relatively soon (like aluminum foil - we're not out yet, but it's close enough that a coupon would come in handy). Once we got to the store, it was more about finding things than perusing the aisles, which helped make things go faster. It also helped me say no to the cookies I found....

Honestly, this "in and out" style of shopping isn't really my thing (I like to go aisle by aisle and get inspired) but it was very useful, especially for basic items like milk and cereal. Since Brian is the exact opposite, we decided to make a habit of splitting the shopping between us and the two stores. I really liked how we were able to work together to save money and still come up with a shopping style that makes us both happy.

Please hit the comments section below or email me at nomoretakeout@gmail.com if you have any suggestions for this couponing newbie. I'd love to hear from you!

Tuesday, May 17, 2011

Jicama (finally!)

After weeks of waiting, I finally tried jicama for the first time. For those of you who don't know what it is, jicama (pronounced hick-a-muh) is a Mexican vegetable that is easily mistaken for a big, oblong potato. Although I have limited use of my nose right now (it must be allergies, colds don't usually last this long) the first thing I thought of when I started peeling it was horseradish. The fresh kind that clears your sinuses at the Seder table on Passover. I was told that it would look like a cross between a potato and an onion (check!) and that it would taste like a cross between a potato and apple (double check!) and that was exactly my experience.

***NEW FOOD ALERT***

Many of the recipes I found suggested slicing the jicama raw and adding lime juice and hot sauce, so I decided to make wraps with leftover hot wings from last night. My jicama was huge (and it was the smallest at the grocery store!) so I only used a little less than a quarter of it for my two wraps. I'll use more next time, but I still think I'll have a lot left over. I was going to add avocado and onion as well, but the avocado didn't survive the week I waited to use it. Some recipes said that the avocado would balance out the flavor of the jicama, so I'll have to try it next time. The lime juice was great because it made the whole thing taste brighter.


I used the other half of my lime to flavor my water. I don't generally drink soda, so I'm always looking for ways to jazz up my beverages. Usually I use lemon, but the lime worked great too. My one friend suggested putting a split vanilla bean in a pitcher of water with orange or raspberries. She said that as long as you refill the pitcher, one vanilla bean can last up to a month. I haven't tried it yet, but I did leave some lemon in my water bottle and it made a big difference.


The jicama was pretty mild, so the lime juice and the spice from the hot wings definitely kicked it up. Next time I'm going to add some more vegetables to the mix and see how it turns out. I was also thinking that it'd be great with fajitas. Overall, I wouldn't say that it's my new favorite vegetable, but it's definitely a must-have for Mexican night.


Jicama, lime juice, and spicy chicken on a whole wheat wrap

I always use fresh citrus when I can, it adds more zing

Sunday, May 15, 2011

A Week in Review

Here's a photo-filled review of how my week went. Well, my week until Thursday, when I went back to the big city for an interview day and wasn't able to cook anymore. I did, however, rediscover the joy of Pirate's Booty and find a restaurant in Chinatown that I would happily move into. I'd also like to extend a huge thank you to Brian, who cooked most of the meals this week. I don't know what I would have done without him.

Saturday:

I had planned to cook haddock, but after the (failed) kumquat experiment, I wasn't really in the mood to cook more, so the fiance stepped in to save the day. He made his specialty: Breakfast for dinner. And to make it even better, he fried pieces of Tuscan bread in a frying pan with butter. Yes, I said butter. Paula Deen would be very proud.

Roasted tomato and fresh mozzarella omelette with fried bread
Monday:

It was time to make that haddock I had bought from the grocery store on Saturday. I wasn't sure which new seafood to try, so I asked the guy behind the fish counter and this is what he recommended. Although they came with the skin on, he said that the people he knew that didn't like haddock the first time they tried it all said that it was because of the skin, so he skinned them for me. He also told me that the fish would taste a little bit stronger than the tilapia I was used to, but that I could cook it the same way. 

I had planned on cooking it in butter or olive oil with some veggies and spices (for some reason I really wanted to use cumin), but I ended up not feeling too well because I have a cold that refuses to go away. So Brian came to my rescue again and made the haddock for me. He modified this recipe by Mario Batali: 

Some of the differences were that he halved the recipe (except for the pasta at the end - we still have a ton left over) and that he used one and a half real diced tomatoes instead of the two cans. I wouldn't recommend those changes because the sauce was a little thin and I felt like the fish got lost a bit in all of the pasta. It was very tasty, though, and very sweet of him to cook me dinner when I was under the weather.

***NEW FOOD ALERT***

Wednesday:

On Sunday I went outside to sit in the backyard behind my apartment complex and discovered that my backyard is really a municipal park. A big, glorious park with bike paths, benches, a playground, a dog park, community gardens, and horses. Yes, you read that right, horses. Here's a picture (it's currently the background on my computer):

It's hard to see it at this size, but those little dots in the pen are horses
Hi Horsey!

Of course, most of my coworkers (and Brian!) already knew about the awesomeness behind my house, but the discovery still made me feel like the little girl from the Secret Garden - I'd known something was back there, but I'd never imagined I'd find something as fantastic as this. 

Now that I'd made my discovery, I had to share it with my friends! So, on Wednesday, I invited my friend over with her two kids so that we could explore the playground together. It was a great success and fun was had by all. All that playing made us hungry, though, so we trooped back to my house for dinner.

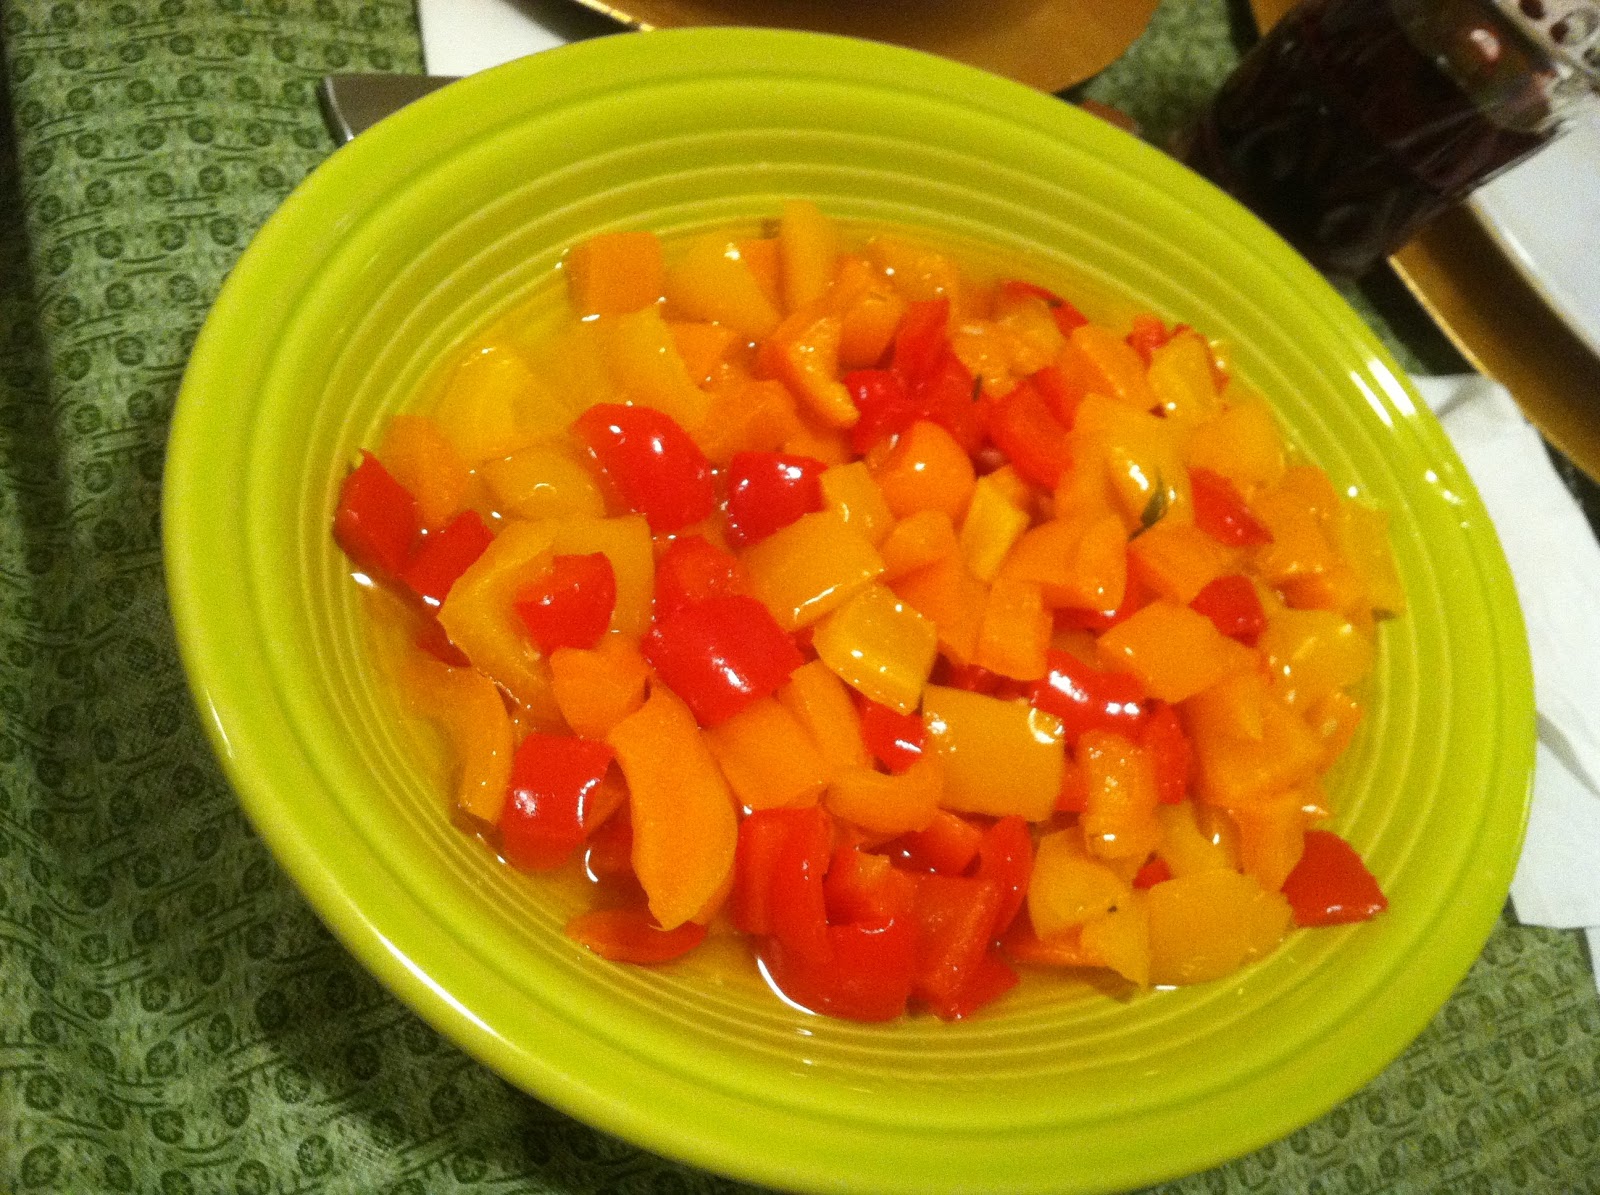
Since it was getting late, I decided to go with something quick and easy. I made lemon feta chicken with fresh mint and a big 'ole salad with cucumber, onion, cherry tomatoes, orange peppers, feta, and fresh basil (which I also used as a centerpiece). The baby really enjoyed the salad - she kept reaching for pieces of pepper. Here's what everything looked like:

I don't use lettuce in my salads - I think it's filler

Hi baby! 

My plate - I really can't get enough of the lemon chicken!

Thursday:

I bought a bunch of snack food to get me through my bus ride to NYC and my long interview day on Friday. I got Pirate's Booty, chocolate meringue cookies, mini muffins, goldfish, and fiji water. While it helped, it didn't stop me from being starving when I got to New York. Luckily my friend was there to whisk me away to Chinatown as soon as I got off the bus. We went to Royal on Mott Street. This place was amazing. Not only did everything that came out of the kitchen look and smell great, but it was also a lot less greasy than its American-ized counterparts. 

We ordered chicken with American broccoli and flank stead with Chinese broccoli (***NEW FOOD ALERT***) My friend preferred the regular broccoli, but I liked the Chinese version. It tasted like a cross between spinach and asparagus.

This is me at the restaurant:

Hi everybody!

And my fortune:

Exactly what you want to hear before an interview day!

Saturday:

Brian picked me up from the bus and announced that after a month of wanting it, he was finally going to make grilled cheese and tomato soup. Who am I to say no to that? Especially since the rainy day and long bus ride perfectly primed me for some comfort food. 

We used condensed Campbell's tomato soup and white American cheese from the deli counter. We like to get our cheese from there because then we can request nice thin slices. It also seems like it's more fresh when it's sliced for you. Instead of regular white bread, we got more of the Tuscan bread and used thick slices to dip in the soup. I also got more of that chicken sausage we used in the Arroz con Pollo.

Mmm......I'm never going back to boring old white bread!

 In Summation:

This may not have been the healthiest week yet, but we still managed to cook more than we used to. The haddock and the Chinese broccoli were both great additions to my food repertoire, and I look forward to making them again in the future. The fiance really pulled through and helped me out when I wasn't feeling well, which was very nice. He used to say that he cooks breakfast and I cook dinner, but this week proved that he's more than capable of switching things up. Next week, be on the lookout for that quinoa post I've been planning, the jicama salad that's been several weeks in the making, and hopefully more ways to prepare chicken than just with lemon juice, garlic, olive oil, and feta cheese. Please email me at nomoretakeout@gmail.com with any cooking suggestions or foods you'd like to see me try - I'm always up for new ideas!

Saturday, May 7, 2011

...And I'm back!

It's been about a month since I've started cooking and trying to eat better, and overall it's been a very positive experience. I've tried several new foods and even more new preparations of foods I thought I already knew pretty well, but were apparently even more wonderful than I knew. I also discovered that excitement is a great thing, but not when it causes you to bite off more than you can chew.

And this past week I learned that old habits die hard, and sometimes you hit a snag, no matter how excited you are. I won't go so far as to say that I completely abandoned the project this week (I didn't order take out even once!) but I do admit that I let a cold get the best of me and didn't push myself to make a list and go food shopping, which caused me to eat out more that I'd have liked.

But I'm back now, and that's what matters. Every diet or eating makeover kick I've ever tried in the past has always failed because once I'd make a mistake, I'd abandon the project. Not this time, though. Today I'm admitting I'm human, getting over myself, and I'm getting back on the horse.

And so, without further ado, I bring you kitchen disaster number two: Kumquats.

***NEW FOOD ALERT***
I'd never had a kumquat before today, although I've always loved the name. For some reason, I'd always assumed that they looked like extra-furry kiwis, but they're actually more like miniature oranges, with (edible) rinds, (not so eatable) seeds, and little sections you can pull apart (if you're so inclined and have precision fingers). Please don't be fooled by my picture - kumquats are to oranges what cherry tomatoes are to beefsteaks. I felt like I was eating the natural version of a warhead sucking candy - it was sour to the point that I almost spit it out. Even so, I wanted to enjoy my purchase, so I soldiered on and looked up recipes that would make them more palatable.

I found this: http://allrecipes.com/Recipe/Kumquats/Detail.aspx

Before you dive right in and try it, though, I have to warn you that 30 minutes may be too long to leave them on the heat and you should definitely keep a close eye on them after they hit the 20 minute mark (you'll see why in a minute). Once the fruit is soft, feel free to add your other ingredients--it's ok if it's not a full half hour. I also suggest slicing them and removing the seeds, as the seeds are quite pungent.

I'm giving you this warning because I waited for the timer to go off and look what happened to my pot:

Ew.

All of the liquid cooked off and I was left with a gooey mess. In the name of experimentation, I tried adding my sugar and spices anyway (along with a little bit of water) and mixing it all together......but I definitely wouldn't recommend this "fix." It looked ok (I guess) but it tasted like a mess. I tried to spread it on bread to give it the benefit of the doubt, but even freshly baked sourdough couldn't rescue this culinary disaster.

Trying to salvage my marmalade....

It looks much better than it tastes....
I want to note that the fact that this recipe wasn't a success for me does not mean that this isn't a good recipe, just that it didn't work out in my kitchen tonight. I still have half a container of kumquats left, so maybe in a few days I'll try it again if I'm feeling adventurous. Or I'll just accept that as much as I love their name, I don't like kumquats.

Monday, May 2, 2011

The Freezer Experiment Part 2, aka: Mexican night!

Yesterday, I finally ran low enough on leftovers to necessitate having to cook again. As much as I love Aunt Lenke's paprikash, it was a huge relief to have it out of my fridge.

I had been talking about making sweet potato fries for weeks (I've never made them before) and I had even bought all of the supplies before my trip. I also bought the fixings for quesadillas and a jicama salad, which is why the freezer experiment erred on the Mexican side of things. Yep, all of these ingredients were already in my pantry, and the one question left was: Are they still edible?

And thus we have the results of the great Freezer Experiment of 2011. I should note that I waited a week longer to consume some of my food than I had originally planned, and that some foods that I was very worried about ending up being perfectly fine. I've reprinted the original list with a short description of what I found when I went to use each food item.

Group 1: Foods I know are freezer-friendly:
  • chicken tenderloins - fine
  • leftover arroz con pollo - fine

Group 2: Foods that should (hopefully) last in the fridge:
  • fresh mozzarella (unopened) - fine
  • mexican cheese blend (also unopened) - fine
  • soy milk - fine
  • lemon wedges - some were fine, others weren't, probably due to different ages in the fridge. The uncut lemons were fine, though.

Group 3: Foods I froze:
  • Collard greens - look fine, but haven't cooked yet. Will report back later
  • half an onion - the front was a little freezer burned, but otherwise fine.
  • cut-up peppers - fine
  • cucumber - had to be thrown out
  • hot green pepper - had to be thrown out (didn't unfreeze well)
  • a lime - unidentifiable
  • fresh parsley - fine

Group 4: Foods I decided not to freeze
  • Garlic - fine
  • Avocado - had to be thrown out (very moldy)
  • Jicama - had to be thrown out (even more moldy than the avocados)
  • Yams - fine. There were growths on the skin, but the inside was fine.
  • Dates - looked fine, didn't try them. I read that I should have refrigerated them, so I got nervous and threw them out without a taste test. I know that it was against the spirit of the experiment, but I rationalized that it was a small price to pay to avoid food poisoning.

What this all really means is that 1) I didn't have to re-buy my dairy, 2) my jicama salad was a non starter, 3) I had everything I needed for my Mexican night.

First, I made my sweet potato fries using a modified version of Paula Deen's recipe. And before you say anything, no, it didn't contain any butter. It also didn't look wildly unhealthy. Instead of following it to the letter, though, I used it as inspiration to find out what might go well together and estimate temperature and cooking time. The recipe basically calls for you to make a blend of spices that you can store for up to 6 months and use on a whole range of items. Instead, I winged it and added most of what I had in my kitchen: salt, garlic powder, paprika, cayenne pepper, and nutmeg. She suggests that you toss the fries in olive oil before adding your spices, so I threw them in my largest pyrex bowl and mixed with my fingers. As I am a 6 year old trapped in a 22 year old's body, this was hands down my favorite part of the process.

Here's a picture of the fries before they went into the oven:


The fiance and I cooked them at 450 for 20 minutes (as per the instructions), but they weren't done yet so we put them back in for 5 minute increments, turning them every time the timer went off. They came out flavorful, but soggy. When I lamented this on Facebook, the Food Yenta suggested that I use whipped egg whites instead of oil. 

The quesadillas took longer to make but were similarly uncomplicated. Since I was unsure about the viability of most of my vegetables, I started by heating up my defrosted peppers and onions separately. The orange pepper was cut before I put them in the freezer, which made it a lot easier for me when I went to use them. It turns out that I had an onion and a half in there, so I waited for them to thaw and then roughly chopped them. It was easier than cutting raw onion because there was enough freeze to keep them together and my eyes didn't sting, but it was also a strange texture. I'm not sure if it was because of the nature of the veggies or the way they were stored, but the onions definitely expelled more water during cooking. Once I knew they were both safe, I put them in my 5 quart pan with some chopped up garlic. They were still really watery, so my sous chef drained them in my new metallic strainer before I added a little olive oil and a handful of fresh parsley. He then cooked them down on the back burner while I turned my sights on the chicken tenderloins.

The chicken decided it didn't want to defrost, so it was time to bring out the big guns, also known as the microwave. Brian is in charge of cleaning the meat in our house because he's got the better knife skills (although that may be changing soon...) Either way, though, he's still the one of the two of us who actually knows what he's doing when he's cleaning protein, so he got that job. Once the chicken was prepped and cubed, I used my little sauté pan to cook 'em up. First I put some olive oil in with a nice heaping wooden spoon-full of garlic. (I used up the garlic I chopped on Saturday. There is something really awesome about using foods you'd prepped for yourself - it's like finding a really thoughtful note in your lunchbox and realizing you're the one who left it there to make you're life a little easier.) Once that got simmering, in went my chicken cubes. I seasoned them with salt, cayenne pepper, cumin, and a couple of squeezes of fresh lemon juice. I love cumin in Mexican-style dishes because it always smells so warm and inviting. A note on cooking meat: don't forget to season both sides! I've been guilty of this many times in the past, but it really tastes so much better when you remember. I had to do the chicken in two batches, so I threw my chicken and its cooking liquid into the veggies to finish while I did the second batch.

Here's what it looked like while we were cooking:

I was in charge of the chicken while my sous chef stirred the veggies. We make a great team!

Putting it all together
Finally we deemed it cooked down and together enough to start stuffing the quesadillas. I thought I had bought spinach tortillas, but it turns out they were spinach and pesto tortillas, so their flavor was a little stronger than I had hoped. After the initial shock of pesto, though, I was really able to taste the filling and the mexican cheese we added. And it tasted goooood.

Here's the final product:

His plate
My plate


Sunday, May 1, 2011

Passover for Mostly Non-Jews: Part 1

Last Saturday was my third annual Passover Dinner for Mostly Non-Jews and it went really well. It's taken me a while to write about it, though, because I wasn't sure how to best do the experience justice. To that end, I decided that I'm going to split this post up into two parts: the pre-cooking shopping adventure where I outfitted my anemic kitchen, and the grand finale dinner for 12.

First off, I need to extend a special thanks to Roberta Chapman (and, by extension, her wonderful boyfriend Al) who spent the entire day with me helping with the planning, shopping, cooking, and table setting. She's a marvel, and my holiday dinner absolutely would not have come together without her.

Part 1: Outfitting My Kitchen

I had two main goals when I was shopping: 1) Get everything I needed to make this party happen, and 2) Spend as little money as humanly possible.

Probably the first question that comes to mind when I talk about buying all new stuff for my kitchen is "How did she get through the first two weeks without cookery?" And to that I have a simple answer: My fantastic former roommates had some amazing kitchen supplies (kitchen aid stand mixer, anyone?) that they graciously let me use. Right before I left for NY, I learned that both of them were leaving while I was away, and while I will miss their cooking utensils, I will miss their awesomeness even more.

Which is a long way of saying that I came back to my house to cook for 12 people and I realized I had bupkis. And so the shopping began.

Roberta and I started our adventure at Good Will. I will admit that I was a bit skeptical at first, but I quickly realized that it is a great place to buy dishes and glasses. For about $50, I got 7 dinner plates, 14 dessert plates, 10 bowls, and 10 chargers (big plates that are used as placemats), a purple plastic pitcher (say that 10 times fast!) and a mosaic vase for my centerpiece. I don't even want to think about how much that would have cost me new. Roberta also bought some gorgeous cut glasses that I borrowed for the night and haven't given back yet.

This is what my table settings looked like (I already had the big blue plates):

A sneak peak of the meal!

And here is that vase I bought with some gorgeous flowers one of my guests brought for the party:


Our next stop was TJ Maxx. I'd never been there before, but I'd heard about the great savings you can find on housewares, so I was eager to go. The first thing I have to say about their selection is that it is a lot more comprehensive than it seems at first glance. It wasn't a huge section, but I was able to find almost everything on my list, including a decent knife block, colored chefs knives, a small Cuisinart food processor, a microplane (great for zesting and mincing garlic), a 5 quart pan, and an omlette/sautee pan. I like how they put both the list price and their price on the label; even as I was spending money I felt great about how much I was saving. 

Aren't they pretty?
Feeling pretty good about ourselves and the state of our shopping list (there wasn't too much more to go), Roberta and Al and I made our way to Bed, Bath, and Beyond. I'm telling you, these people are the nicest, most patient people on the planet. Because I agonized. Over every purchase. The great thing about Bed, Bath, and Beyond is that it truly has everything. The bad part is that it has so many options, and many of them are way above my price range. The shopping trip was wisely structured so that only the last odds and ends were purchased there, which was great because I know my total would have been triple or quadruple the amount if I had been able to make a beeline for the pretty things at the start of my day. I walked out with a ladle, a cutting board, a mesh strainer, and a three piece set of pyrex bowls WITH LIDS! (And boy, did those lids end up coming in handy!) The bowls are really great because not only are they mixing bowls and storage containers, but they can double (triple?) as serving dishes because they're clear glass. You'll see all three of them down below on my Passover table.

Last but not least was Walmart. And God Bless it because I was able to finish off my entire shopping list in the span of one aisle. And even get the same silverware I'd been eyeing in Bed, Bath, and Beyond for $20 cheaper. With a metallic mesh organizer attached. Granted, it wasn't the heavy, multifaceted set I initially fell in love with, but at a little more than a third of the price for 12 place settings, it was perfect. I also found a green vinyl (read: easy to clean) table cloth that perfectly fit my elongated table, oven mits, pot holders, and fancy napkins.

Cambridge Silversmiths Piermont Satin 60 piece silverware
And because Roberta rocks, all of this was accomplished before my 4pm cooking deadline. Once we got back to my house, the mad dash to unpack and wash everything began. Each of the items from Good Will had an individual sticker label, so Roberta, Al, and I had to sit at the table and peel off each and every one before they went into the dishwasher. Even though I had obviously been there when we bought everything, seeing it all laid out everywhere made me feel like I was 6 again and I was opening a pile of birthday presents. Even the fiance got excited when he saw my haul - Brian's been talking about getting an omelet pan for weeks. (And on a side note - the next day he taught me how to use said omelet pan. I flipped an omelet all by myself!) Roberta and Al left to get ready for the party and Brian and I made sure everything was clean and raring to go.

Finally, it was time to cook.

Passover For Mostly Non-Jews: Part 2

Part 2: The Passover Meal

The very first thing I did was start chopping vegetables for my paprikash, because it's a stew and it needs time to do its thing. The second was send Brian to my room to grab a pen and a piece of card stock so I could plan out what dishes I was making, which pot(s) I was using for each one, how I was going to organize my burners, and how much time each item needed. While this probably would have been better accomplished with an excel spreadsheet on my computer (and should have been done in advance!), I preferred using the thick paper because then I could plop it next to me while I was cooking without having to worry too much about it getting wet/dripped on/thrown under a hot pan/chopped by an errant knife. Thankfully, it all lined up perfectly, although there was going to have to be some fancy juggling in the middle when I switched 3 out of the 4 burners. I highly recommend making a list like this before you try juggling a big meal, it makes you less likely to forget to cook a side dish (and before you ask, yes, that has happened to me before).

Back to the paprikash. This recipe is courtesy of my Great Aunt Lenke, who was like a third grandmother to me when I was a kid. Unfortunately she passed away when I was in middle school, but her delicious family recipes still live on. It doesn't feel like a holiday unless we have one of her iconic dishes. Here is a recipe as well as a picture of the finished product. Although this can come together in as quickly as an hour and a half, it tastes a lot better if you let it simmer on the stove for at least three to four hours because then the sauce has time to reduce and thicken and the chicken literally falls off the bone and shreds itself. The end consistency should be halfway between a soup and a stew, and it is usually better the second day when everything has time to meld together even more.

Aunt Lenke's Chicken Paprikash (makes 10-15 servings)

You'll need:

1 large stockpot (with lid)
1 family pack of chicken thighs (or 1 whole chicken, cut into parts)
1 small (4oz) can of tomato sauce
1 medium onion 
1 green pepper (I prefer red because it has a sweeter flavor, but Aunt Lenke used green)
1 bag peeled baby carrots (optional)
3 tablespoons paprika (at least, feel free to add more if you like)
1 tablespoon minced garlic (if you're using fresh, use at least 3-5 cloves, if not more.)
2 tablespoons olive oil (or enough to coat the bottom of the pot)
Salt to taste
  1. Put the stockpot on medium heat and add olive oil.
  2. Roughly chop the onion and the pepper. When the oil is hot, add the garlic, onion and pepper. Cover the pot.
  3. Once the onion is translucent, add the paprika. It should look pasty. 
  4. Trim the chicken thighs and add them to the mixture.
  5. Add enough water to cover the chicken (I usually just bring the pot to the sink).
  6. Add tomato sauce and salt.
  7. About 15 minutes later, add carrots if desired. 
  8. Let simmer on low-medium heat for at least 1 hour, preferably 3-4, stirring occasionally. Turn down heat if the pot begins to boil over.
Great Aunt Lenke's Famous Chicken Paprikash!

The next dish I had to get going was my Matzoh ball soup. Most people use chicken broth for their base, but I prefer onion soup because it's the way my cousin makes hers. She makes her own stock, but I cheat and buy mine from the store. My broth of choice is Pacific Organic Onion Soup because it has a rich hearty flavor. It's always been a big hit at dinner parties, and last week was no different. In addition to my broth (I used two 32 oz containers' worth), I added 2 onions, 3 small parsnips, a bag of baby carrots, a generous helping of minced garlic, and some parsley. I cooked all that down for about an hour before I even started my matzoh balls. Since I'm writing this post in the same order I cooked each dish, you'll have to scroll down to read about the matzoh balls and see how it all turned out! 

Next on the list was the green beans, but first I had to run downstairs for a quick wardrobe change. Roberta and Al came back while I was doing my thing, and I re-emerged to the sound of them furiously snapping 3lbs of green beans. Man, that's a lot of green beans. I decided to triple the Food Yenta's recipe (I've posted it here and made it several times in the last few weeks because it's just that good), but I think I went a little overboard. We definitely had a lot of leftovers.

I used my new Pyrex as serving bowls. They were perfect!

While they snapped away, I started my caramelized peppers. I posted the recipe for them in my Passover's Coming Early! post and, as usual, they didn't disappoint. I used three peppers (one each red, orange, and yellow) and had no leftovers, so it was just enough. Next time I will definitely make more, but I have a feeling that those will disappear as well. Here's what it looked like:

Roberta lent me her serving dish - doesn't it look lovely?

Then it was time for the barley. So, paprikash can have a few different side dishes. Either you can throw in some quartered potatoes when you add the carrots and boil them for a while, or you can make a side of egg noodles, or even some flour dumplings. Or you can make barley. My mom's a big fan of the barley version, so I made it in her honor. Since I'd never cooked it by myself before, though, I wasn't sure of the cook time or the precise time I needed. Here's some advice for next time: Never cook an unknown dish at a dinner party. It took a half hour longer than I'd bargained for and I still wasn't sure it was done. I also had a huge amount of leftovers that I'm still trying to find ways to utilize. It tasted great with the main dish, though.

And there was even more in the pot....
While all that was cooking, my friend and I started the matzoh balls. I had to take the paprikash off the stove so that I had room to boil the water, but it kept just fine because by that point, it had already been cooking for over two hours. We used the recipe on the canister of matzoh meal, with the only departure being that we added some more matzoh meal when it came out a little runny. The recipe says that one batch makes 8 servings, but in my experience, it's more like 4-6, so we decided to quadruple it to make sure we'd have enough for everyone. We ended up with 24 matzoh balls, which was exactly the amount we needed for 12 people. Once the dough was chilled, even more people got in on the action by helping to form the fluffy balls of goodness. This was always my favorite part of holiday cooking because Dad usually had things handled in the kitchen, but I was always called upon to help roll the matzoh balls and drop them into the water. It's a fun way to get people involved in the kitchen, and since almost all of my guests had arrived at that point, I wanted as many people as possible to feel included in the cooking. Once formed, I let them soak up the boiling water for about 15 minutes and then drained them into my new wire mesh sink-sized strainer and tossed them into the soup. You want to make sure that they're fully cooked before you throw them into the soup because if not, they'll soak up all your liquid while you're not looking. Matzoh balls are like edible sponges; they quickly absorb flavors, but they can deplete soup pots just as quickly.

Here's the finished product:

I enjoyed it so much, I made myself some more for breakfast the next day!

The last main dish I made was tilapia fillets poached in butter, rosemary, and garlic. Not only was it as easy as it sounds (all I did was melt the butter and roast the garlic and rosemary in it before pouring it over the fish), but it took all of 15 minutes to make - 2 minutes to put the sauce together and 13 minutes in the oven baking at 400. I used two sticks of butter, two sticks of rosemary, and the rest of my minced garlic. And it tasted delightful.

Again, beautiful serving dish courtesy of Roberta.

Speaking of things that were delightful, I have to take a minute to talk about my garlic. I was brought up on the jars of minced garlic that you buy at the grocery store, but after a month of using the fresh stuff, I'll never go back. This is great in theory, and perfectly fine in practice when we're talking about one or two dishes, but there was no way I was taking time out of my cooking schedule to chop multiple cloves of garlic every time I wanted to start something new. So, I gave myself a present and spent the night before my adventure sitting at my kitchen table with a cutting board, a ton of garlic, a sharp(ish) knife, and Psych on Netflix. I don't even want to know what my roommates thought. It took me a long time (mostly because the best knife I had was woefully dull and pretty sucky), but also because once you get to the 20th clove of garlic, peeling the skin off stings your fingers. It was totally worth it though, because all day (and throughout the whole next week) I was able to quickly scoop out my desired amount of garlic and add it to any and all of my dishes. Next time, though, I'm going to try my cousin's tip and grate it with my brand new micro plane. I'm rather excited about this, mostly because I spent the entire time in fear of losing a finger tip.

They look huge here, but they're actually little baby containers. Aren't they cute?

For dessert, I tried my hand at the apple spice cake I wrote about in Passover's Coming Early! I accidentally used less matzoh meal than I was supposed to, but I honestly don't think it would have been dough enough to make a thick, fluffy cake even if I had (and that's with cutting the number of apples in half). Instead, I drained some of the excess oil and pressed all of the dough into the bottom of the pan to form a crust and then topped it with the apples so that it resembled a cobbler. I'm happy to report that it came out delicious and the crust came doesn't taste like matzoh meal at all. It was a big hit, especially with the Honey Vanilla frozen yogurt that Roberta and Al picked up to go with it.

As you know, I have a thing for close-ups.
Brian and I also made more chocolate covered matzoh, but this time we made both dark and milk chocolate varieties. To be honest, we ate more than our fair share, but could you blame us?

This was all that was left of dessert - and we made a sheet pan each of the matzohs!

And now on to the fun part - pictures of my dinner party! It took me a lot longer to get here then I thought I would...I guess I made more food than I realized. The first picture is of most of my guests at the table (I was the one taking it):

I can't tell you how happy this picture makes me :)

More table pics (in order from left to right - someone with better photoshop skills could probably make this a panorama):


I'm the one on the end!

Next up is a close-up of my friend's plate. There's a little bit of everything on there:

Nice and colorful

I was feeling a bit artistic, so I took this picture when I was done with my first course:

I'm a bit in love with my new place settings
And finally, because it had to happen sometime, here's a picture of my kitchen back to normal:


Well, almost normal. Even though Roberta's table and my roommate's chairs were gone, some of the party decorations still remain. And they're going to stay, because I think they look snazzy and my guy roommates are nice enough to let me decorate. I'm really happy with how the flowers on the wall turned out - I wasn't planning to put them up (they'd previously been in my bedroom), but the walls looked so bare that I had to do something. Luckily, I had just switched rooms a couple of days before, so all of the flowers were down and within reach. I handed some packing tape and a handful of flowers to one of my guests and had her enlist everyone's help to put them up. I think it came out awesome and I love that they were a group effort. And speaking of group efforts, once the meal was over, the whole dinner party turned into a clean-up army and worked together to put my kitchen back together. It was amazing, and I'm truly grateful.

Overall, I'd say that my dinner party was a huge success. Everything came together in wonderful--sometimes surprising--ways and none of my guests left hungry. I had a lot of great moments throughout the day, but probably my favorite was right at the beginning when I told the story of Passover to 11 people happily slurping their soup. There's something truly satisfying about seeing people you care about enjoying your food and helping to celebrate your culture.