I haven't posted on here in a while. At first I was busy; since then I've just been hiding. The strange thing is that Brian and I actually made 3 or 4 more dishes back in July that I was so excited to share at the time, but just never got around to posting. July was a crazy month of 10 hour work days and lots of ice cream (trust me, I needed it), so I cut myself some slack. But then August came (and with that the Great Move, something I'll touch on more later), which actually gave me an unprecedented amount of down time. By that point, I was just scared.
Being held accountable for what I eat is slightly terrifying. So in many ways, I've been hiding, both from you and from myself. If I don't write about it, no one has to know about it, not even myself. I don't have to keep track of the restaurants I've been in or the oreos I've eaten or the amount of times I've asked Brian to cook something quick for me (or, on that note, the amount of butter he's put into it). It's easier to just stop cooking and blogging all together than to admit defeat (yet again) and start back up (yet again). Coming up with meals is time consuming and cooking, while less so, still feels like a big production. It's not--as I discovered a few months ago--but it still feels that way.
A project that wasn't supposed to feel like a diet is really starting to act like one.
Not to say that I haven't legitimately been busy. Since the last time we've spoken, I've moved twice, started a new job, started school, attempted unpacking, and decided that I'm just not settled enough right now to get back into cooking. The Great Move consisted of first moving from PA to LI, languishing in my mom's apartment for two and a half weeks, and then moving again from LI to NYC. As stressful as moving was, I'm very lucky to have a supportive family who came together to make all of this possible. Without their help, I never would have been able to pack/drive the U-haul to NY from PA, store my stuff in a safe (and free!) place, find a place to stay, or have an amazing relay team get my things from the second U-Haul to my apartment in an elevator that is roughly the size of a door squared. While I thought I had my bases covered, what I wasn't anticipating was the massive brain exhaustion from worrying about my new home, buying things to get set up, and just plain waiting for school to start. Even after we got into our new (gorgeous) apartment, standing on that precipice has been so consuming that I haven't even been able to fully unpack. With my internship in its second week and classes finally getting underway today, I'm hoping I'll be able to get myself back in gear ASAP.
Until then, though, I'm going to continue hiding. Just for a little longer. Just until I have learned how to juggle all of the balls I've got up in the air. Hopefully I'll be back soon, but in the meantime I've got a few guest posts up my sleeve that I'll be unveiling periodically. Thank you for all of your encouragement and support :)
See you later,
Danielle
Wednesday, September 7, 2011
Tuesday, July 12, 2011
Guest Post: Josh's Risotto!
My friend Josh messaged me the other day to ask what he should make for dinner. He said that he had been inspired by my efforts and wanted to make a real meal for dinner instead of just having pita and hummus (a great snack, to be sure, but not the same as a full meal). He gave me a run-down of what he had in the house and based on the chicken stock, wild rice, and mushrooms he had in his pantry, I suggested a risotto. It was a lengthy process, but he was very happy with the results, so I asked him to write a guest post about his experience. Please enjoy Josh’s post below; hopefully it will inspire you to get into the kitchen as well!
 |
| Thanks for posting, Josh! |
Hello World.
I’ve never written a blog post before, so I was a little skeptical when Danielle suggested I contribute to her site. This entry might turn out to be a mess, but I assure you that it won’t be nearly as bad as the mess I made in the kitchen!
I am quite culpable of eating far too much food not of my own creation. Reading this blog has been steadily increasing my guilt factor over the last few days, so I finally decided to cook something.
So, Danielle suggested a risotto and I found this recipe (http://allrecipes.com/recipe/butternut-squash-and-shiitake-mushroom-wild-rice-risotto/detail.aspx) online for Butternut Squash and Shiitake Mushroom Wild Rice Risotto and gave it a whirl. The recipe calls for 40 minutes of prep time and 60 minutes of cooking time, but you have to be pretty on your game to be that quick. I have no counter space and am a slow chef, so it was about two and half hours after I started that I finally got to eat.
This recipe has some distinct stages, so you’ll want to read over the recipe before you begin to make sure you have everything rolling.
I’ve never cooked with butternut squash before, so I learned that peeling is important; if I didn’t have a peeler, this would have been miserable. Don’t just peel the outer coating, though. You want to peel until you get to the deeper orange of the squash “meat.” And you’ll need to clear out the seeds and gunk from the center. One squash was plenty for me (even with a third of the squash falling in the trash bin…).
I made some minor substitutions for economy, availability, and by accident. I bought fresh shitakes without realizing the recipe called for dried, but that seemed to work fine. Perhaps dried have a sharper taste. Maple syrup became pancake syrup because I couldn’t justify $9 for an ingredient I needed a tablespoon of. And the supermarket (not really so super) didn’t have any short grain rice, so I went with a medium grain. I also went with the parmesan over the gorgonzola, but to each their own. I imagine the gorgonzola would make for a richer of a risotto, which I kind of wanted later, but I’m wary about gorgonzola… If you can swing the Parmigiano-Reggiano, great, but I used a plain jane block of parmesan.
I’ve had a few bad experiences cooking rice recently, so I was really worried about the rice cooking fully. After I spilled some of the vegetable stock, I was worried about not having enough liquid to soak into the rice, so I added some more white wine (I doubt you can go wrong there). When you’re adding the liquid into the rice mixture (this is done in stages), I’d recommend a ladle. This lets you transfer enough liquid without pouring liquid down the side of your saucer (yes, I’m speaking from experience…sizzzzzzle).
I ended up with a ton of risotto, so I invited a friend over to eat it with me. That being said, I could probably have fed six more. The risotto is quite filling, so the portion you need for a meal is much less than I realized.
Ultimately, the dish came out better than I expected, especially the consistency. The wild rice added some tougher texture to give the dish more textural dimension than a normal risotto. I cut the amount of wild rice by two and it still worked well enough. I feel that the dish might need one more flavor to bring it home. I’m thinking it needs truffle, so if I did it again, I’d sprinkle in some truffle oil Yeah, I know it’s not real truffle (http://www.nytimes.com/2007/05/16/dining/16truf.html), but I’m not Jean Georges!
 |
| Work in Progress |
 |
| The End Result! |
--------------------------------------------------------------------------------------------------------------------------
If you or any of your friends have started cooking more as a result of this blog, please let me know – I’d love to make this a regular feature!
Wednesday, June 29, 2011
Mom's Stir Fry
My mom called me up today and said "I have an onion, peppers, and beef that's been cut up into strips, how do I make a stir fry?" I couldn't believe my ears. I even made her repeat herself.
As a general rule, my mom doesn't cook. It's not that she can't, per se, it's that she just never wanted to. I mean, in the general sense, sure, but in the immediate "hey, let's cook dinner tonight!" way, she was always much more inclined to order chinese food. Needless to say, I was shocked to hear that not only did she want to cook, but that she'd already bought ingredients!
I tried looking up recipes, but a lot of them included things that mom just doesn't have, like a fully-stocked spice rack and three different types of vinegar. Instead, we decided to improvise. Mom got out a big saucepan, some olive oil, garlic powder, paprika, and a few soy sauce packets from the last time she ordered chinese food.
First, she heated up olive oil so that it would be hot when the meat hit the pan. She had a little problem with her stove because it was making the oil evaporate, but then she turned down the heat and it was just fine. She then used 4 packets of soy sauce, garlic powder, and a little bit of paprika to make an impromptu marinade for her meat. At first I suggested less soy sauce, but with over a pound of meat, she thought more was appropriate.
Next, she chopped her onion and cut her multicolored pepper strips into smaller, bite size pieces. She asked me if she had too many peppers for her one onion, so I told her that she's the chef and it's her call. She ended up using all of them.
Once her oil began to spit (or start shooting hot oil at her), she put in her steak. She also opened more soy sauce packets and put them in a measuring cup so that she could pour it on her veggies while they cooked.
As soon as her meat browned (she flipped it once), she seasoned and added her vegetables. And then realized that the pan wasn't big enough for all of her ingredients! She freaked out a little bit, but then she grabbed a new pan, started heating some more olive oil with some cooking liquid from the other pan, and scooped out as many veggies as she could. When the new pan got hot, she put the peppers and onions in there to cook down so that they wouldn't take up as much space when cooked with the beef.
When the vegetables cooked down, she put them back in with the meat, let the flavors simmer together for a minute, stirred, and served.
I'm very proud of her for attempting this stir fry, especially since she came up with the idea all on her own. Even though I was on the phone talking her through it, she really did this all by herself. And the best part is - she had fun :)
Well, maybe the second best part. The real best part was that it came out so good that she's already talking about cooking again!
As a general rule, my mom doesn't cook. It's not that she can't, per se, it's that she just never wanted to. I mean, in the general sense, sure, but in the immediate "hey, let's cook dinner tonight!" way, she was always much more inclined to order chinese food. Needless to say, I was shocked to hear that not only did she want to cook, but that she'd already bought ingredients!
I tried looking up recipes, but a lot of them included things that mom just doesn't have, like a fully-stocked spice rack and three different types of vinegar. Instead, we decided to improvise. Mom got out a big saucepan, some olive oil, garlic powder, paprika, and a few soy sauce packets from the last time she ordered chinese food.
 |
| Improvisation, a cook's best friend! |
First, she heated up olive oil so that it would be hot when the meat hit the pan. She had a little problem with her stove because it was making the oil evaporate, but then she turned down the heat and it was just fine. She then used 4 packets of soy sauce, garlic powder, and a little bit of paprika to make an impromptu marinade for her meat. At first I suggested less soy sauce, but with over a pound of meat, she thought more was appropriate.
Next, she chopped her onion and cut her multicolored pepper strips into smaller, bite size pieces. She asked me if she had too many peppers for her one onion, so I told her that she's the chef and it's her call. She ended up using all of them.
Once her oil began to spit (or start shooting hot oil at her), she put in her steak. She also opened more soy sauce packets and put them in a measuring cup so that she could pour it on her veggies while they cooked.
As soon as her meat browned (she flipped it once), she seasoned and added her vegetables. And then realized that the pan wasn't big enough for all of her ingredients! She freaked out a little bit, but then she grabbed a new pan, started heating some more olive oil with some cooking liquid from the other pan, and scooped out as many veggies as she could. When the new pan got hot, she put the peppers and onions in there to cook down so that they wouldn't take up as much space when cooked with the beef.
When the vegetables cooked down, she put them back in with the meat, let the flavors simmer together for a minute, stirred, and served.
 |
| Good job, Mom! |
I'm very proud of her for attempting this stir fry, especially since she came up with the idea all on her own. Even though I was on the phone talking her through it, she really did this all by herself. And the best part is - she had fun :)
Well, maybe the second best part. The real best part was that it came out so good that she's already talking about cooking again!
Monday, June 27, 2011
Tart Time!
The Food Yenta posted a link a while ago for a beet and goat cheese risotto that looked like something I had to try. The post was witty and well-written, and the finished product boasted a winning food combination. There was one problem, though: the dish looked like raw meat. The author described it as "jewel-toned" and although I agreed at first, the more I looked at it, the more it looked like blood. The Food Yenta's solution was to substitute red beets for yellow ones. Mine was to take my craving for beets and channel it into a dish that I already know I love: The Food Yenta's Beet and Goat Cheese Tart.
I already wrote a little bit about the tart back in my second post, aptly named The Food Yenta as a homage to my facebook friend who helped me get started on my better food kick. When you're done with this post, head on over to her blog at thefoodyenta.blogspot.com to gawk at her amazing pictures (she's a professional photographer in addition to being a foodie) and try out some of her incredibly simple recipes. You won't be disappointed.
The last time I tried this recipe, I decided that I didn't like goat cheese and wasn't going to use it. This was a poor decision. Not only was the cheese I chose too strong for the flavors of the dish, but the truth is that I'd never had goat cheese before and was just afraid to try it. I faced my fear over my birthday weekend at a local restaurant and discovered that goat cheese was a lot milder and yummier than I had initially thought. As today is the first time I've ever used goat cheese in anything and only the second time I'm eating it, I'm going to classify this as a ***NEW FOOD ALERT***
 |
| Goat Cheese = ***NEW FOOD ALERT*** |
This time around I'm going to document the entire process, from trying to roast beets to fighting with puff pastry dough. Because I'm taking time away from cooking to write about it, the cooking time is going to seem very long. The recipe should take about an hour to prepare and 45 minutes to bake, which is still pretty long but not unreasonable.
And now, a running commentary of the cooking process, complete with pictures and recipe modifications. Here we go!
7:14pm: Time to get started! I don't remember how to roast my beets, but I'm sure the internet will tell me.
7:17pm: The internet comes through again. Here's the website I used to help me roast my beets last time: http://localfoods.about.com/od/preparationtips/ss/How-To-Roast-Beets.htm . They took over an hour because I used 4 really big ones, but today I'm using 2 medium ones, so I'm going to start with a half hour and check on them from there.
 |
| Fresh beets :) |
7:45pm: Ok, I've got my beets in the oven, my puff pastry defrosting, and the recipe right in front of me, I'm good to go. Next up is making the balsamic honey onions.
7:57pm: I modified the recipe a little bit by using white balsamic vinaigrette, clover honey, and some garlic powder (I forgot to get garlic). I'm also using only one onion because last time there was enough for a whole week and I want to try to minimize leftovers.
 |
| Bubble bubble toil and trouble.... |
8:03pm: It was looking a little thin, so I added some more honey. The measurements are just guesstimates, feel free to alter them to your liking. The white balsamic smells a bit sharp right now, but the sweetness of the honey will mellow it as it reduces down.
8:19pm: Great tip for defrosting puff pastry fast: let it sit out next to the stove while the onions are cooking. Well, ok, it was an accident, but it got the job done. My puff pastry is from the freezer section and comes in pairs. Last time I completely forgot about putting it away, so my second pastry became a gooey mess instead of tart number 2 (as I had planned). I tried to roll it into a ball and start again, but then I found out that by rolling it up, I completely ruined the texture that makes puff pastry puff up. Whoops.
Here's what my pastry looked like defrosted and put in the pie mold. The edges are crimped with a fork so that they stay down, not necessarily because it looks cool (although it totally does).


8:22pm: Onion update: They're mostly translucent and starting to smell sweet. Now I just have to wait for the liquid to reduce.
8:26pm: Beets are roasted and resting. They look a little like shriveled coconuts.....
 |
| I've got a lovely bunch of beets, deedle dee dee |
8:28pm: Onions done. See how the onions have changed color and you can clearly see the bottom of the pan? That means they've absorbed the flavors. When you use regular balsamic, they end up a little darker caramel color. You can also tell they're done because they resist the spoon more.
 |
| Sweet and tangy |
8:43pm: Time to make the filling. I don't particularly like dill, so my first thought was to replace it with basil. My basil plant went limp, though, so I decided to substitute mint instead. I have no idea how the mint will go with the beets, but considering it mixed really well with the vinaigrette for my cucumber blueberry salad, I figured it couldn't hurt.
 |
| Yes, my mixing bowl has a spout. It's awesome. |
8:52pm: This is me sloughing off the beet skin. You can tell the skin's off because the beet has a slightly lighter and more purplish color. (Thanks to Brian for taking the picture!)
 |
| Yes it's hot pink, and yes it will get all over everything. |
 |
| Isn't that a beautiful color? |
9:13pm: All done and in the oven! Whew! Here are pictures of the tart getting set up. The Food Yenta said two beets, but I think one would have been enough. Since I had so much extra, I decided to do two layers of beets instead. I finished it off with goat cheese, parsley, and some torn mint for garnish (although not too much because I put a ton in there).
 |
| First layer of Beets |
 |
| Adding the onions |
 |
| A second beet layer, extra goat cheese, a handful of fresh herbs, and it's all ready! |
10:09pm: Out of the oven and looking great! We had a little photo session to make sure I got it's good side for my post. Brian's heading off to work in a few minutes, so we'll cut into this beauty then.
10:31pm: Wow, it is out of this world! The crust is light and flaky and the hidden layer of beets really ramps up the flavor. I didn't expressly taste the mint as a distinct flavor, but the tart had a refreshing after taste that I attribute to it. It's a lot smoother than last time too; the goat cheese has a very nice flavor. I realized after I finished that I easily could have made two tarts, and I think that's what I'll do next time. Although I think I'm going to do two layers again, because all those beets turned the tart hot pink, and you know I can't resist a pretty picture.
Speaking of, here it is, in all its glory:
Speaking of, here it is, in all its glory:
 |
| Smells as good as it looks! |
 |
| Extreme Close-up |
Sunday, June 26, 2011
An Unexpected Salad
My local grocery store puts out a free seasonal magazine that has all sorts of great recipes (all featuring the store's branded products, of course). The recipes all looked great (gotta love professional food photography), but I was a little skeptical of some of the flavor combinations. Cucumber and blueberry salad? Really?
Yes, really. And it was delicious. Here's the recipe: Cucumber & Blueberry Salad with Feta
The whole thing took maybe 5 minutes to put together. It can be served right away, but I'd recommend letting it sit in the fridge for at least 30 minutes to let the flavors come together and the salad to chill. We used less salad dressing than recommended and I noticed that at first it tasted very strong anyway, but the longer it sat, the more it mellowed. So if you make it and you think it's a bit pungent at first, don't worry, it will probably be fine in a little while.
Originally I made it as a light dinner for me and my friend, but then last night I had it as a side dish with some lemon garlic chicken breasts that Brian encouraged me to buy for a night when I wasn't up to cooking a full meal (great suggestion, honey!). I think I like it better as a side because the meat served as an anchor for it. I definitely felt more fulfilled the second time around. The reviewers on the recipe site suggested bringing it to a BBQ as an alternative to pasta salad and I wholeheartedly second this idea.
This recipe made enough for 3 full meals and 2 side dishes, which I'm going to say averages out to either dinner for 4 or side dish for 8. Then again, it's so good, that you might find it goes a lot quicker :)
Yes, really. And it was delicious. Here's the recipe: Cucumber & Blueberry Salad with Feta
The whole thing took maybe 5 minutes to put together. It can be served right away, but I'd recommend letting it sit in the fridge for at least 30 minutes to let the flavors come together and the salad to chill. We used less salad dressing than recommended and I noticed that at first it tasted very strong anyway, but the longer it sat, the more it mellowed. So if you make it and you think it's a bit pungent at first, don't worry, it will probably be fine in a little while.
 |
| Cucumber, Blueberry, Feta, Mint, and White Balsamic Vinaigrette. That's it! |
This recipe made enough for 3 full meals and 2 side dishes, which I'm going to say averages out to either dinner for 4 or side dish for 8. Then again, it's so good, that you might find it goes a lot quicker :)
Saturday, June 25, 2011
Bonus Post!
I wasn't planning on writing about this, but I think I have to. I spent the evening making a Beet and Goat Cheese Tart (post coming later this week) and I'm pretty tired. Enter Brian. After he does all the dishes in the sink (what can I say, I'm a lucky woman!), he notices that the bananas are getting brown and offers to make me a snack to have while my tart is baking. How sweet is that?
He modified this recipe by using more cinnamon and cardamom and by adding the honey directly to the bananas instead of after. Well, halfway through cooking it dawns on him that have neither yogurt or ice cream to put it on. He calls me over to the freezer and we start going through what we have. Lemon tea bars? Italian ices? Frozen veggies?
And then we see it - Weight Watchers English Toffee Crunch Bars. Perfect. Brian grabs bowls and starts putting ice pops in them while I check on the bananas. Then we break them up, layer the sweet goodness on top, and dig in.
It might not look like much, but let me tell you, it was heavenly. Two ice pops and one small banana was just enough for a sweet treat I didn't have to feel guilty about. It tasted like bananas foster, but without the flames or the alcohol. I highly recommend all of you try it. Right now. Like, go to the store and buy what you need for it. I'll wait.
And so goes your bonus post for today. It was unplanned, but this dessert was just too good not to write about. Be on the lookout for posts coming this week, I've been busy writing and cooking all day and I think you're going to like what I've come up with.
He modified this recipe by using more cinnamon and cardamom and by adding the honey directly to the bananas instead of after. Well, halfway through cooking it dawns on him that have neither yogurt or ice cream to put it on. He calls me over to the freezer and we start going through what we have. Lemon tea bars? Italian ices? Frozen veggies?
And then we see it - Weight Watchers English Toffee Crunch Bars. Perfect. Brian grabs bowls and starts putting ice pops in them while I check on the bananas. Then we break them up, layer the sweet goodness on top, and dig in.
 |
| And then it got all melty and gooey....yummmm |
It might not look like much, but let me tell you, it was heavenly. Two ice pops and one small banana was just enough for a sweet treat I didn't have to feel guilty about. It tasted like bananas foster, but without the flames or the alcohol. I highly recommend all of you try it. Right now. Like, go to the store and buy what you need for it. I'll wait.
And so goes your bonus post for today. It was unplanned, but this dessert was just too good not to write about. Be on the lookout for posts coming this week, I've been busy writing and cooking all day and I think you're going to like what I've come up with.
Back in the Saddle
Ok, so it happened again. I've only had this blog a few months and I've already backslid twice, this time for 3 weeks. It's so easy to slip back into old routines if you're not paying attention, and sometimes it can happen even if you're trying to counteract it. It started with me being tired and lazy for a few days and asking Brian to take over the cooking. Then it became too many meals of bread with jam and fresh mozzarella. And finally, it became a life of cereal and stopping at Subway after work, two of my least favorite ways to nourish myself. I spent a week trying to compile a healthy grocery list, but kept becoming overwhelmed with my options and putting off the actual grocery shopping due to laziness. It all came to a head this week when Brian came downstairs with his scavenged dinner of frozen corn and instant mashed potatoes and I decided that I'd had enough. Again. So I got down to business, picked some recipes I think we'll all enjoy, and took my man shopping with me.
Getting back on the horse is hard, but if you don't do it, how can you go anywhere?
Be on the lookout for more posts from me this week, I've got a summer salad I'd like to share, that quinoa recipe I've been promising for ages, cod in the fridge, and sunchokes I'm going to experiment with.
I'm sorry I disappeared, but I'm back now, and it's time to start cooking again.
Friday, June 10, 2011
Art Projects!
Today's post isn't about cooking, it's about some super easy art projects I did yesterday to celebrate my birthday! I love decorating and doing nice things for myself, so these projects were right up my alley. Not to mention that they completely give in to my love of office supplies!
The first project was flower pens. They are exactly what they sound like. I love this project because it creates a functional centerpiece or desk decoration. To make them, you buy fake flowers, cheap pens (with caps, not the clicky kind), and floral tape (it's green). Then you cut the stems on the flowers so that they are a little shorter than the pens, and wrap the tape around both until they are secure and the pen looks like part of the stem. It's up to you how much the flower hangs over the end, but with my flowers I found it easier to just go up to the top.
I found a cool idea on this website that suggested putting your flower pens in a vase or flower pot with floral beads. I already had the beads from a previous project, so I decided to go this route. I was going to paint the pot as well, but I think it looks cute with it just plain.
This project was really cheap as well. The pens were $2.50 for 50, the bouquets were $8 each from Michaels (with about 12 flowers per bunch), the floral tape was $1/roll, and the pots were about $1 each. My friend Tanya and I shared everything, which made it even cheaper.
Here's how they turned out:
Since we still had a TON of clear capped pens left over, we decided to jazz them up and make colored pens as well. All you have to do it open the pen up, roll paper around the ink stick, tape it down on the ends, and put it back in the pen. It took a lot longer than it should have because we originally tried to use paper that was too thick, but we finally figured it out. We discovered that colored tissue paper works great for this because it's thin, easy to roll, and comes in tons of colors. Tanya stuck to the pastels while I went for hot pinks and purples. This one was my favorite because it has an almost metallic sheen to it (even though the paper was just regular purple). We easily used up the rest of our jumbo pack of pens this way.

While we were getting supplies from Target, Tanya and I decided to add a third project to the list. We found lined straw tote bags in the dollar section (they were $2.50, but still incredibly cheap) and figured out ways to jazz them up. Tanya bought patterned ribbon (also from that section and only $1) and I chose to decorate with flowers (yes, there's a theme here). The flowers I picked were silk orchids that we found in the decor section (only $5). I bent the stalk and fastened it to the bag using hot glue. I think it came out really classy!

If you decide to do this project at home, I highly recommend cutting off the excess stem before trying to attach the flowers and then gluing the ends first (starting with the bottom one). When working with hot glue, it's important to hold the two pieces together until they dry so that they attach properly. Once the ends are secure, you can use the glue gun to trace a line of glue under the stem so that everything stays in place.
Maybe yesterday was more like my 12th birthday than my 23rd, but so what? There's no age limit to having fun making stuff :)
The first project was flower pens. They are exactly what they sound like. I love this project because it creates a functional centerpiece or desk decoration. To make them, you buy fake flowers, cheap pens (with caps, not the clicky kind), and floral tape (it's green). Then you cut the stems on the flowers so that they are a little shorter than the pens, and wrap the tape around both until they are secure and the pen looks like part of the stem. It's up to you how much the flower hangs over the end, but with my flowers I found it easier to just go up to the top.
I found a cool idea on this website that suggested putting your flower pens in a vase or flower pot with floral beads. I already had the beads from a previous project, so I decided to go this route. I was going to paint the pot as well, but I think it looks cute with it just plain.
This project was really cheap as well. The pens were $2.50 for 50, the bouquets were $8 each from Michaels (with about 12 flowers per bunch), the floral tape was $1/roll, and the pots were about $1 each. My friend Tanya and I shared everything, which made it even cheaper.
Here's how they turned out:
 |
| Mine |
 |
| Tanya's |


If you decide to do this project at home, I highly recommend cutting off the excess stem before trying to attach the flowers and then gluing the ends first (starting with the bottom one). When working with hot glue, it's important to hold the two pieces together until they dry so that they attach properly. Once the ends are secure, you can use the glue gun to trace a line of glue under the stem so that everything stays in place.
Maybe yesterday was more like my 12th birthday than my 23rd, but so what? There's no age limit to having fun making stuff :)
Wednesday, June 1, 2011
Winner Winner Chicken Dinner
Happy Belated Memorial Day, Everybody!
We didn't do much celebrating this past weekend (I honestly hadn't realized what weekend it was until, like, the day before), so for us Memorial Day was less about pools opening and BBQs heralding the beginning of summer than a reason for nice people at Brian's work to bring in huge tubs of potato and pasta salad for him to go home with. (And white wine, which is how we had all of the ingredients for the chicken picatta I wrote about earlier).
As it turns out, oven stuffer roaster chickens were on sale last week (buy one get one free), so I already had the perfect accompaniment to the salads he brought home. This chicken was a true group effort - Brian defrosted and cleaned the bird, then I stuffed and seasoned it. We then worked together to figure out how to cook it. We consulted Ina Garten's Perfect Roast Chicken recipe to help us with temperature and timing. Even though our chicken was a pound bigger than the recipe called for, cooking time ended up at 1:35 (which is pretty much Ina's directions). We weren't sure if that'd be the case though, so we had a few false starts with the time. Luckily, the chicken came out perfectly moist, despite the breast being cut in half from the one time I thought it was done, started cutting it, and realized it was still way too pink.
 |
| I'm glad we cut it before we tried to eat it! |
As usual, we took some liberties with the seasoning - we added cayenne pepper, cumin, garlic powder, and replaced the thyme with rosemary because it's what we had in the house already. We also skipped the veggies on the bottom of the roasting pan because we already had side dishes ready to go.
 |
| Our big, beautiful roast bird! |
Once the chicken was (really) done, Brian decided he wanted gravy. So we tried our hand at making gravy, something we'd never done before. This recipe suggested starting with 2 tablespoons of chicken droppings (the stuff at the bottom of the baking pan), adding two tablespoons of flour, and then adding back more droppings and enough chicken broth to make about two cups of gravy. The flour thickened really quickly at first and created a gelatinous paste, but it evened out when I wisked in the rest of the liquids. I'd never had chicken gravy before, only turkey, so I'm going to count this as a ***NEW FOOD ALERT***


From droppings to gravy in 7 minutes flat!
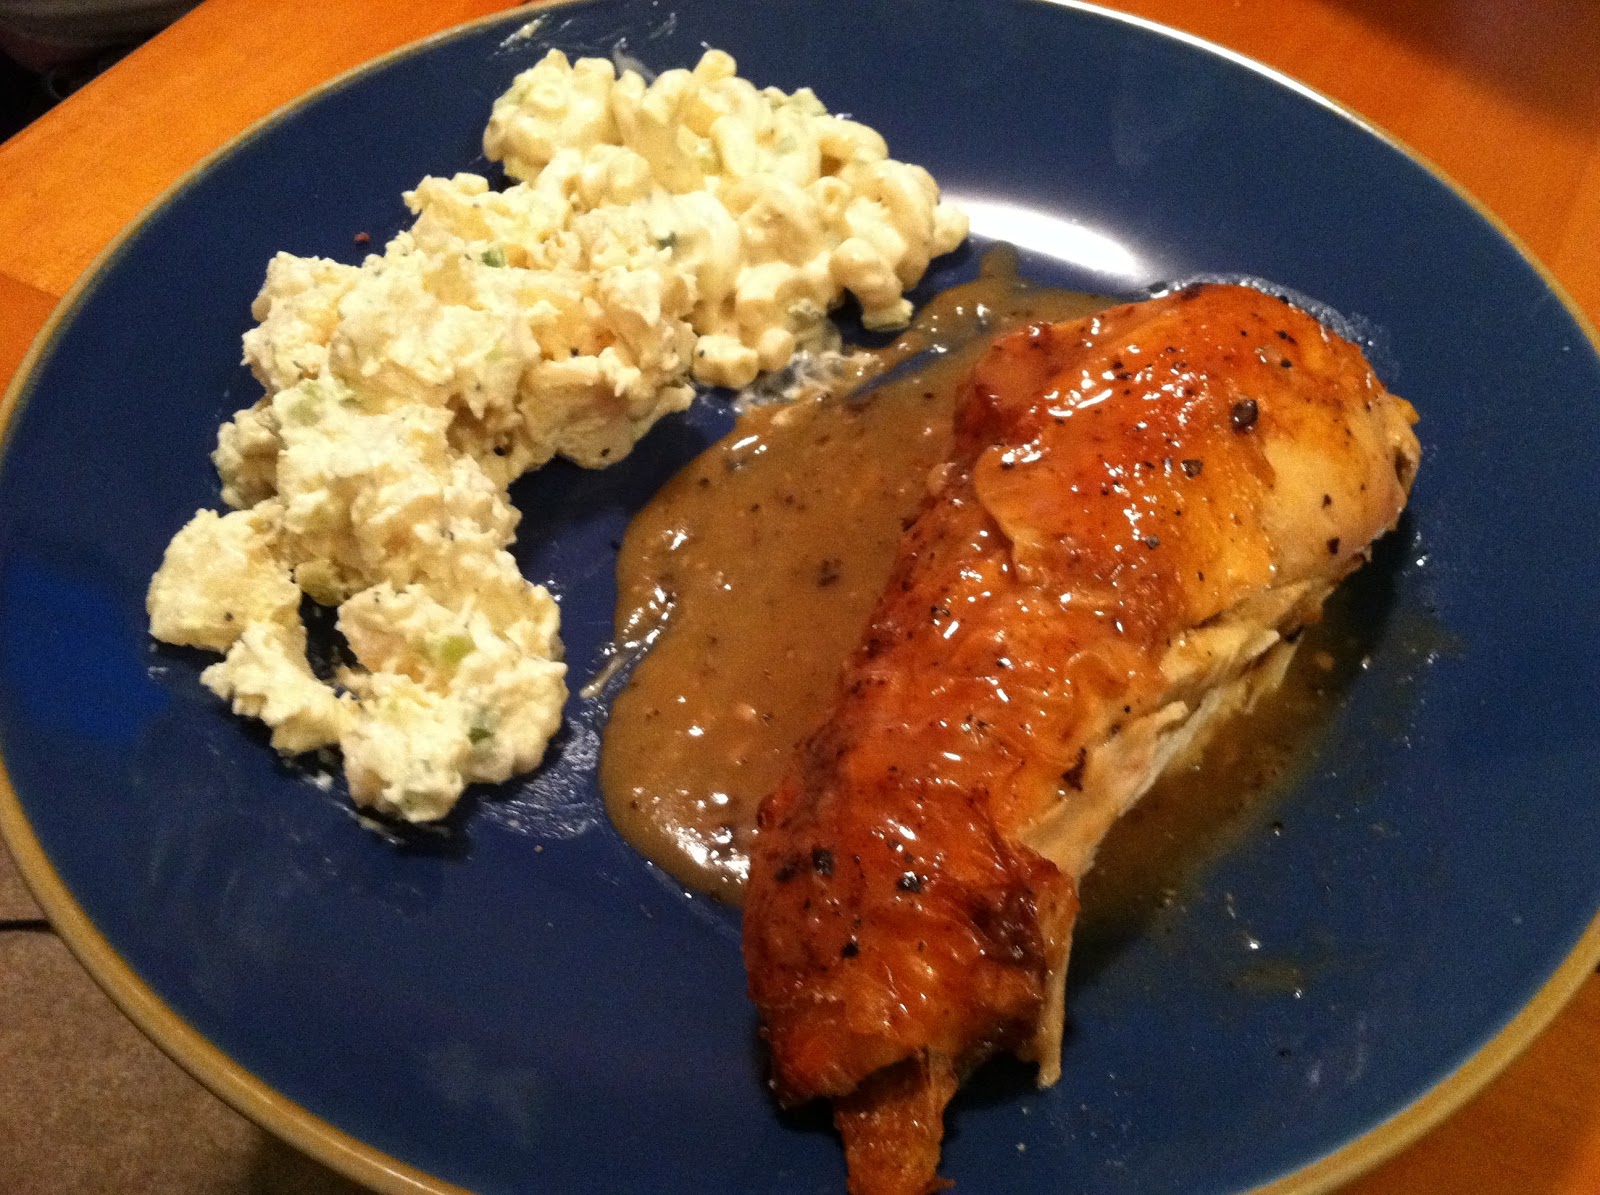 |
| Putting it all together :) It may have been a day late, but we brought together a great Memorial Day meal. Happy Unofficial Start of Summer! |
Tuesday, May 31, 2011
My Farmer's Market Adventure
So, the real reason I haven't been posting much this week is because I have discovered the joys of bread. Yes, bread. My diet has mainly consisted of cheddar sourdough and fresh banana bread and spicy raspberry-chipotle preserves that I bought at the farmer's market last week, with some fresh mozzarella thrown in for good measure. I tell ya, it's the ultimate snack food. Perfect for breakfast, lunch, or dinner, and light enough for a midnight snack. So. Good.
What makes it great, though, is the jam. It's made by a company called Piper's Peck and it's sold at local PA farmers markets and online at http://www.piperspeck.com/hot_pepper_jellies.html. My favorites are the raspberry-chipotle preserves and the Cayenne Pepper Jelly. There's just spicy enough to cut the sweetness, but not enough to send you running for the hills. She also makes spicy chocolate fudge and a line of salsas that I've been meaning to try.

Another great local find is Fasta Ravioli & Co., affectionately called "Fasta Pasta" in our house. Last Friday was free pasta day and Brian and I each snagged a free pound of fettucini - mine was egg and his was wheat. It's all fresh pasta that's made on-site at their downtown State College location. Fasta Pasta has actually become a tradition for Brian and I - we've had their ravioli and vodka sauce on almost every special occasion for over a year, including our birthdays, Christmas (he's not Jewish), my college graduation, our anniversary, Valentine's Day, and a few times just because it was Tuesday. We always love seeing what they're going to come up with next!
We decided to turn Brian's whole wheat pasta into Chicken Picatta a la this recipe from Rachel Ray: http://www.foodnetwork.com/recipes/rachael-ray/chicken-piccata-pasta-toss-recipe2/index.html Now, most people who know me know of my incredible dislike for Rachel Ray, so it's a pure coincidence that this recipe is from her. To be honest, the only reason we used it was because somehow, without planning for it, we managed to have everything we needed on the ingredient list (except shallots, but we didn't miss them).
I never would have found any of this if I hadn't gone to the famer's market. Which is my way of telling all of you that farmer's markets are the best part of cooking in the summer and you should definitely make sure that you don't miss out!
What makes it great, though, is the jam. It's made by a company called Piper's Peck and it's sold at local PA farmers markets and online at http://www.piperspeck.com/hot_pepper_jellies.html. My favorites are the raspberry-chipotle preserves and the Cayenne Pepper Jelly. There's just spicy enough to cut the sweetness, but not enough to send you running for the hills. She also makes spicy chocolate fudge and a line of salsas that I've been meaning to try.

Another great local find is Fasta Ravioli & Co., affectionately called "Fasta Pasta" in our house. Last Friday was free pasta day and Brian and I each snagged a free pound of fettucini - mine was egg and his was wheat. It's all fresh pasta that's made on-site at their downtown State College location. Fasta Pasta has actually become a tradition for Brian and I - we've had their ravioli and vodka sauce on almost every special occasion for over a year, including our birthdays, Christmas (he's not Jewish), my college graduation, our anniversary, Valentine's Day, and a few times just because it was Tuesday. We always love seeing what they're going to come up with next!
We decided to turn Brian's whole wheat pasta into Chicken Picatta a la this recipe from Rachel Ray: http://www.foodnetwork.com/recipes/rachael-ray/chicken-piccata-pasta-toss-recipe2/index.html Now, most people who know me know of my incredible dislike for Rachel Ray, so it's a pure coincidence that this recipe is from her. To be honest, the only reason we used it was because somehow, without planning for it, we managed to have everything we needed on the ingredient list (except shallots, but we didn't miss them).
 |
| Grilled chicken with a crispy crust |
 |
| Brian coating the chicken in sauce |
 |
| The finished product |
I never would have found any of this if I hadn't gone to the famer's market. Which is my way of telling all of you that farmer's markets are the best part of cooking in the summer and you should definitely make sure that you don't miss out!
Thursday, May 26, 2011
Indian Spices Giveaway
I checked my facebook page today and discovered that more than 100 people have "liked" my page! I can't tell you how happy and excited I was to see that, it's a great feeling to see that so many people are supporting me on this journey.
In honor of this great milestone, I've decided to do a giveaway!
One winner will receive a set of Indian Spices that includes Curry Powder, Garam Masala, and Tumeric. They come in these cute little jars and make a perfect gift for your favorite cook (especially if it's yourself!)
To enter, please leave a comment below or on my facebook page with your favorite food to cook (recipe optional but greatly appreciated!) In one week I'll use a random name generator to pick the winner!
Good luck and thank you again!

**Please note, all entries must include a valid email address so that I can notify the winner. If the winner does not respond to my email to claim their prize within one week of notification, a new winner will be selected.
Wednesday, May 25, 2011
It's Bacon! It's Pineapple! It's Dinner!
Remember that commercial with the dog who runs around the house screaming "it's BACON!!!!!!"? Well, consider me that dog. Because my house smells like bacon and it's utterly fantastic.
For those of you whose ears didn't just start ringing with the sound of a hyper-active, annoying pooch, here's a link to the commercial on youtube: http://www.youtube.com/watch?v=CErapf79rqM
I don't usually eat bacon, but while I was combing the internet for more resources, I came across a recipe I just couldn't resist. It's a modified turkey club with an avocado sauce and I was really excited about it because I've been wanting to try my hand at de-pitting an avocado. And did I mention the bacon?
Here's the recipe I used: http://www.foodnetwork.com/recipes/food-network-kitchens/turkey-avocado-clubs-recipe/index.html
I really like this version because I hate mayo (almost all condiments, actually) and this one uses plain greek yogurt instead (mmm....fage). I added some cayenne and garlic powder to the avocado mixture to ramp up the flavor a little bit, and I used hickory smoked turkey. I also grilled the bread in a little bit of bacon fat (a real little bit - I barely coated the pan) to add cohesiveness to the sandwich.
A warm shout-out goes to my roommate Nick who did the actual cooking of the bacon. He had no idea what he was doing but he soldiered on anyway, leaving tastiness in his wake.
 |
| Sizzlin' |
I've never cooked with avocado before (judge's ruling - can that count as a new food alert???) so I was really excited to whack at the pit with my chef's knife. Apparently I wasn't excited enough, though, because that bugger wouldn't budge. For anyone who's unfamiliar with avocado anatomy, avocados have a dark green skin, light green flesh, and an annoying pit right plop in the middle. The way everyone tells you to cut it is to cut into the flesh and make a big circle around the pit, then open it up and use your knife to grab the inedible bit. In the end, I opted to just dig it out with my spoon. It was just easier that way. Speaking of easier, I threw the yogurt and avocado into the food processor because I was too lazy to mash with my spoon. It came out really good though.
 |
| Picture from these instructions on how to cut an avocado! |
 |
| Avocado yogurt sauce with cayenne and garlic powder! |

Are those pineapple chucks, you ask? Why yes, yes they are! And not just any old pineapple chunks, but chunks from the first pineapple I've ever cut up! Nick and I used our trusty dusty friend google to figure this one out. We ended up on Instructibles.com: How to Chunk a Pineapple Like a South Seas Island Boy. The instructions themselves were great, but it was annoying to have to click "next" to view each step because it took a little while to load each one on my iPhone and some of them were pretty repetitive. It was effective though, and it helped me turn my pineapple from this:
 |
| Hi Pineapple! |
 |
| Yumm. |
 |
| Gotta love a big knife! |
 |
| Oh yea...fancy knife skills |
I never realized that there was a core I had to cut out, so I'm glad I had some internet guidance before I dug right in. There are tons of other how-to guides out there if this one doesn't strike your fancy. The internet has been very helpful throughout this whole process because it's sort of like your cooler older cousin - it knows everything, gives great advice, and isn't afraid to be goofy to get its point across.
Cooking with avocado and pineapple made me feel very accomplished. Even though they're not "new" foods, it's always fun to learn new ways to prepare some of your favorites. And this sandwich is definitely going to be a new favorite.
Sunday, May 22, 2011
Lists (Part 2)
Like many places, my town has two types of grocery store: the normal kind and the fancy-shmancy one. Considering that 2 months ago I was buying what little groceries I had from Walmart, both of these places would have been a huge improvement. But I chose to get to know the the fancy one better because the selection seemed better, the food seemed fresher, and it had a cafe area that I could sit at while I finalized my grocery list. This has worked well for me on all but one level - it's coupon prospects sucked. Luckily, Brian is more skilled in couponing than I am, and he agreed to show me why he has always favored the other grocery store.
The reason is, in a word, DOUBLE coupons.

And they seriously rock. All told, we saved about $50 on items that we would have bought anyway. Consider my mind blown.
As I mentioned in a previous post, the grocery list is the best way to protect yourself from expensive impulse buying. Brian took it a step further by going on the store's website and helping me match items on my list with discounts he could get with his bonus card. Then we used the weekly circular to look for extra deals on items we were already buying and other things that we need relatively soon (like aluminum foil - we're not out yet, but it's close enough that a coupon would come in handy). Once we got to the store, it was more about finding things than perusing the aisles, which helped make things go faster. It also helped me say no to the cookies I found....
Honestly, this "in and out" style of shopping isn't really my thing (I like to go aisle by aisle and get inspired) but it was very useful, especially for basic items like milk and cereal. Since Brian is the exact opposite, we decided to make a habit of splitting the shopping between us and the two stores. I really liked how we were able to work together to save money and still come up with a shopping style that makes us both happy.
Please hit the comments section below or email me at nomoretakeout@gmail.com if you have any suggestions for this couponing newbie. I'd love to hear from you!
The reason is, in a word, DOUBLE coupons.
And they seriously rock. All told, we saved about $50 on items that we would have bought anyway. Consider my mind blown.
As I mentioned in a previous post, the grocery list is the best way to protect yourself from expensive impulse buying. Brian took it a step further by going on the store's website and helping me match items on my list with discounts he could get with his bonus card. Then we used the weekly circular to look for extra deals on items we were already buying and other things that we need relatively soon (like aluminum foil - we're not out yet, but it's close enough that a coupon would come in handy). Once we got to the store, it was more about finding things than perusing the aisles, which helped make things go faster. It also helped me say no to the cookies I found....
Honestly, this "in and out" style of shopping isn't really my thing (I like to go aisle by aisle and get inspired) but it was very useful, especially for basic items like milk and cereal. Since Brian is the exact opposite, we decided to make a habit of splitting the shopping between us and the two stores. I really liked how we were able to work together to save money and still come up with a shopping style that makes us both happy.
Please hit the comments section below or email me at nomoretakeout@gmail.com if you have any suggestions for this couponing newbie. I'd love to hear from you!
Tuesday, May 17, 2011
Jicama (finally!)
After weeks of waiting, I finally tried jicama for the first time. For those of you who don't know what it is, jicama (pronounced hick-a-muh) is a Mexican vegetable that is easily mistaken for a big, oblong potato. Although I have limited use of my nose right now (it must be allergies, colds don't usually last this long) the first thing I thought of when I started peeling it was horseradish. The fresh kind that clears your sinuses at the Seder table on Passover. I was told that it would look like a cross between a potato and an onion (check!) and that it would taste like a cross between a potato and apple (double check!) and that was exactly my experience.
Many of the recipes I found suggested slicing the jicama raw and adding lime juice and hot sauce, so I decided to make wraps with leftover hot wings from last night. My jicama was huge (and it was the smallest at the grocery store!) so I only used a little less than a quarter of it for my two wraps. I'll use more next time, but I still think I'll have a lot left over. I was going to add avocado and onion as well, but the avocado didn't survive the week I waited to use it. Some recipes said that the avocado would balance out the flavor of the jicama, so I'll have to try it next time. The lime juice was great because it made the whole thing taste brighter.
I used the other half of my lime to flavor my water. I don't generally drink soda, so I'm always looking for ways to jazz up my beverages. Usually I use lemon, but the lime worked great too. My one friend suggested putting a split vanilla bean in a pitcher of water with orange or raspberries. She said that as long as you refill the pitcher, one vanilla bean can last up to a month. I haven't tried it yet, but I did leave some lemon in my water bottle and it made a big difference.
The jicama was pretty mild, so the lime juice and the spice from the hot wings definitely kicked it up. Next time I'm going to add some more vegetables to the mix and see how it turns out. I was also thinking that it'd be great with fajitas. Overall, I wouldn't say that it's my new favorite vegetable, but it's definitely a must-have for Mexican night.
 |
| ***NEW FOOD ALERT*** |
Many of the recipes I found suggested slicing the jicama raw and adding lime juice and hot sauce, so I decided to make wraps with leftover hot wings from last night. My jicama was huge (and it was the smallest at the grocery store!) so I only used a little less than a quarter of it for my two wraps. I'll use more next time, but I still think I'll have a lot left over. I was going to add avocado and onion as well, but the avocado didn't survive the week I waited to use it. Some recipes said that the avocado would balance out the flavor of the jicama, so I'll have to try it next time. The lime juice was great because it made the whole thing taste brighter.
I used the other half of my lime to flavor my water. I don't generally drink soda, so I'm always looking for ways to jazz up my beverages. Usually I use lemon, but the lime worked great too. My one friend suggested putting a split vanilla bean in a pitcher of water with orange or raspberries. She said that as long as you refill the pitcher, one vanilla bean can last up to a month. I haven't tried it yet, but I did leave some lemon in my water bottle and it made a big difference.
The jicama was pretty mild, so the lime juice and the spice from the hot wings definitely kicked it up. Next time I'm going to add some more vegetables to the mix and see how it turns out. I was also thinking that it'd be great with fajitas. Overall, I wouldn't say that it's my new favorite vegetable, but it's definitely a must-have for Mexican night.
 |
| Jicama, lime juice, and spicy chicken on a whole wheat wrap |
 |
| I always use fresh citrus when I can, it adds more zing |
Sunday, May 15, 2011
A Week in Review
Here's a photo-filled review of how my week went. Well, my week until Thursday, when I went back to the big city for an interview day and wasn't able to cook anymore. I did, however, rediscover the joy of Pirate's Booty and find a restaurant in Chinatown that I would happily move into. I'd also like to extend a huge thank you to Brian, who cooked most of the meals this week. I don't know what I would have done without him.
I had planned to cook haddock, but after the (failed) kumquat experiment, I wasn't really in the mood to cook more, so the fiance stepped in to save the day. He made his specialty: Breakfast for dinner. And to make it even better, he fried pieces of Tuscan bread in a frying pan with butter. Yes, I said butter. Paula Deen would be very proud.
 |
| Roasted tomato and fresh mozzarella omelette with fried bread |
It was time to make that haddock I had bought from the grocery store on Saturday. I wasn't sure which new seafood to try, so I asked the guy behind the fish counter and this is what he recommended. Although they came with the skin on, he said that the people he knew that didn't like haddock the first time they tried it all said that it was because of the skin, so he skinned them for me. He also told me that the fish would taste a little bit stronger than the tilapia I was used to, but that I could cook it the same way.
I had planned on cooking it in butter or olive oil with some veggies and spices (for some reason I really wanted to use cumin), but I ended up not feeling too well because I have a cold that refuses to go away. So Brian came to my rescue again and made the haddock for me. He modified this recipe by Mario Batali:
Some of the differences were that he halved the recipe (except for the pasta at the end - we still have a ton left over) and that he used one and a half real diced tomatoes instead of the two cans. I wouldn't recommend those changes because the sauce was a little thin and I felt like the fish got lost a bit in all of the pasta. It was very tasty, though, and very sweet of him to cook me dinner when I was under the weather.
 |
| ***NEW FOOD ALERT*** |
Wednesday:
On Sunday I went outside to sit in the backyard behind my apartment complex and discovered that my backyard is really a municipal park. A big, glorious park with bike paths, benches, a playground, a dog park, community gardens, and horses. Yes, you read that right, horses. Here's a picture (it's currently the background on my computer):
 |
| It's hard to see it at this size, but those little dots in the pen are horses |
 |
| Hi Horsey! |
Of course, most of my coworkers (and Brian!) already knew about the awesomeness behind my house, but the discovery still made me feel like the little girl from the Secret Garden - I'd known something was back there, but I'd never imagined I'd find something as fantastic as this.
Now that I'd made my discovery, I had to share it with my friends! So, on Wednesday, I invited my friend over with her two kids so that we could explore the playground together. It was a great success and fun was had by all. All that playing made us hungry, though, so we trooped back to my house for dinner.
Since it was getting late, I decided to go with something quick and easy. I made lemon feta chicken with fresh mint and a big 'ole salad with cucumber, onion, cherry tomatoes, orange peppers, feta, and fresh basil (which I also used as a centerpiece). The baby really enjoyed the salad - she kept reaching for pieces of pepper. Here's what everything looked like:
 |
| I don't use lettuce in my salads - I think it's filler |
 |
| Hi baby! |
 |
| My plate - I really can't get enough of the lemon chicken! |
Thursday:
I bought a bunch of snack food to get me through my bus ride to NYC and my long interview day on Friday. I got Pirate's Booty, chocolate meringue cookies, mini muffins, goldfish, and fiji water. While it helped, it didn't stop me from being starving when I got to New York. Luckily my friend was there to whisk me away to Chinatown as soon as I got off the bus. We went to Royal on Mott Street. This place was amazing. Not only did everything that came out of the kitchen look and smell great, but it was also a lot less greasy than its American-ized counterparts.
We ordered chicken with American broccoli and flank stead with Chinese broccoli (***NEW FOOD ALERT***) My friend preferred the regular broccoli, but I liked the Chinese version. It tasted like a cross between spinach and asparagus.
This is me at the restaurant:
 |
| Hi everybody! |
And my fortune:
 |
| Exactly what you want to hear before an interview day! |
Saturday:
Brian picked me up from the bus and announced that after a month of wanting it, he was finally going to make grilled cheese and tomato soup. Who am I to say no to that? Especially since the rainy day and long bus ride perfectly primed me for some comfort food.
We used condensed Campbell's tomato soup and white American cheese from the deli counter. We like to get our cheese from there because then we can request nice thin slices. It also seems like it's more fresh when it's sliced for you. Instead of regular white bread, we got more of the Tuscan bread and used thick slices to dip in the soup. I also got more of that chicken sausage we used in the Arroz con Pollo.
 |
| Mmm......I'm never going back to boring old white bread! |
In Summation:
This may not have been the healthiest week yet, but we still managed to cook more than we used to. The haddock and the Chinese broccoli were both great additions to my food repertoire, and I look forward to making them again in the future. The fiance really pulled through and helped me out when I wasn't feeling well, which was very nice. He used to say that he cooks breakfast and I cook dinner, but this week proved that he's more than capable of switching things up. Next week, be on the lookout for that quinoa post I've been planning, the jicama salad that's been several weeks in the making, and hopefully more ways to prepare chicken than just with lemon juice, garlic, olive oil, and feta cheese. Please email me at nomoretakeout@gmail.com with any cooking suggestions or foods you'd like to see me try - I'm always up for new ideas!
Subscribe to:
Posts (Atom)